Highlight:
cell signal blocker
, prison cell phone jammers
Professional Network Prison Cell Phone Jammers In Schools And Military Base
Professional Network Prison Cell Phone Jammers In Schools And Military Base
OPERATION MANUAL
Ver 2.2
CONTENTS
SIGNAL JAMMER CENTRALIZED MONITORING SYSTEM.. 1
1. Introduction. 4
2. System Requirements. 4
2.1 Hardware:... 4
2.2 Software:. 4
3. Interface Description. 5
3.1 NavBar:. 5
i. Logo:... 6
ii. Device Information:... 6
iii. Operation Permission Mangement 6
iv. User Management 7
v. Change Logo and the Login Background pictures. 7
【Change Logo】: to change the Logo and the login background pictures by yourself. 7
vi. Log out and change the user password: 7
3.2 Functional Area:. 7
i. Title Bar:... 7
ii. Display Operation Area:... 7
4. Operation Instructions. 8
4.1 Login. 8
i. Server Login:... 8
ii. Remote Login:... 8
iii. Login Operation:... 8
4.2 Device Information Management. 9
i. Add new device. 10
ii. Modify device parameters. 11
iii. Delete the device. 11
4.3 Device Monitoring and Maintenance. 11
i. Operation Method:... 11
ii. Operation Parameters:... 14
4.4 Operation Permission Mangement 15
4.5 User Management. 17
4.6 Change Logo and the Login Background pictures. 18
4.7 Log out and change the User Password.. 18
1. Introduction
【SIGNAL JAMMER CENTRALIZED MONITORING SYSTEM】is a professional networking centralized monitoring platform, is used to conveniently maintain and monitor the Signal Jammer products manufactured by our company.
Signal Jammers are largely used for anti-terrorist, information privacy, personnel control, etc, installed in Military Bases, Prisons, Schools, Churches, etc, the large areas. When a large number of installed jammers and geographical distribution of more decentralized case, one by one to maintain these devices are neither convenient nor economical, for which we designed and developed this online centralized network monitoring platform【SIGNAL JAMMER CENTRALIZED MONITORING SYSTEM】.
The platform allows customers to keep a query or control all Jammers accessed to the Internet, and all the alarm information jammers real-time feedback to the customer, so that customers can stay at home to have all information of jammers running, and adjust the control parameters of the Jammers to suit the operating environment of the installed area, greatly reduce the customer's maintenance workload.
The platform enables real-time display of all Jammers’ output power, operating temperature, alarm information, and all information can be specific to each Channel, real-effective, convenient and quick.
2. System Requirements
Hardware:
CPU: 2.4 GHz Intel I5 above
RAM: 4GB;
Hard drive: 100GB;
Software:
Operation: Win7 Ultimate
Browser: IE9 or Google Chrome;
3. Interface Description
【SIGNAL JAMMER CENTRALIZED MONITORING SYSTEM】is a web-based working system, the Interface is composed by the left NavBar and the right Functional Area, as shown below:
NavBar:
The left NavBar, including the customer Logo, Device Information, Equipment Exception Management, Operation Permission Management, User Management and Admin to Log out, etc. as shown below:
Logo:
【Logo】:show the Logo of Customer,can be changed according to the customers’ request;
Device Information:
【Device information】: to add a new device, modify the device information, device functional operation and delete the existing equipment;
For functional operation of the device seeing [4.3 Equipment Monitoring and Maintenance]
After logging into the platform, the Device information page will be displayed, or when you browse other pages and clicking the left navigation bar [Device information] to jump to that page.
Operation Permission Mangement
【Operation Permission Mangement】: to show and manage the operation right of different User Groups.
User Management
【User Management】: to show and manage all the users: add/delete a user, change the user group to get the Operation Rights of corresponding group.
Change Logo and the Login Background pictures
【Change Logo】: to change the Logo and the login background pictures by yourself.
Log out and change the user password:
【Log out】:Click【admin】to log out the system and change the user password.
Functional Area:
Including the Title Bar and the Display Operation Area;
Title Bar:
Showing the name of 【SIGNAL JAMMER CENTRALIZED MONITORING SYSTEM】and providing English and Portuguese Language selection button: ;
Software name;
Language selection button;
Display Operation Area:
To query and monitor the Jammers, see details at Item 4 1. Operation Instructions.
4. Operation Instructions
4.1 Login
Server Login:
If you are operating directly on the server, start the server IE9 or Google Chrome browser, in the address bar enter "http://localhost/login.aspx", and then click the [Login] button to enter the login screen (recommend to add the address into favorites for future login);
Remote Login:
If login from a computer except the Server, e.g., any computer on the Internet, then open the IE9 or Google Chrome browser, in the address bar, enter “http:// : 18081 ", where" remote Server IP "is the public static IP leased from Network Operators, and then click the [Login] button to enter the login screen (recommend to add the address into the favorites for future login);
E.g., the figure below the address bar filled "61.184.32.7" is remote experiment server with public IP address of our company;
Note: This address is only used as an example, not guaranteed access.
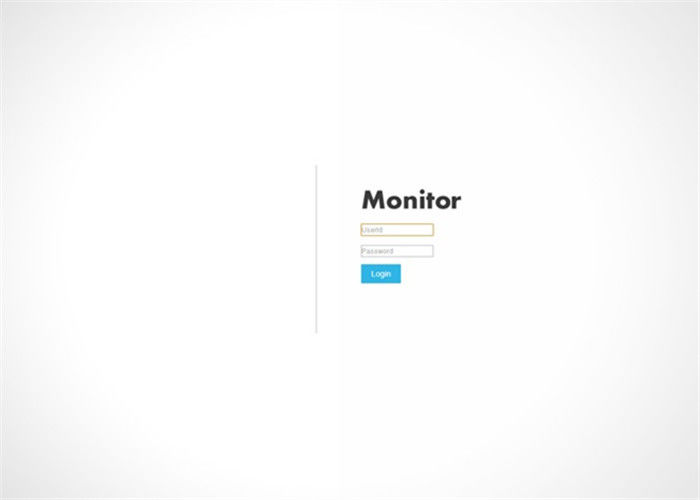
Login Operation:
The Login Interface as follow:
Input User name;
Input Password
Click to login;
The default administrator user name and the default password is "admin"
Device Information Management
【Device information】,into the page of Device Information Management;
There are several devices on the list above, if there is no device, will be just a [New] button.
This page is composed by following:
Title
[New] button to add new equipment;
Device list;
In front of each device list there is the device status LED, as shown below:
Device Offline;
Device On-line
Device On-line, but Alarming
At the end of device list there is the device Functional buttons, as shown below
【Operation】Operate the device;
【Edit】Edit Device Information;
【Delete】Delete the device;
Add new device
【New】to enter into the page of adding new device,as shown below:
Input Device Name;
Input Device ID;
Input Device information memo;
save the new device;
cancel the operation;
Step of adding new device:
Input the Device Name in 【Name】box, the device name is customer made, no limit;
Input Device ID in【Device Id】box. The ID is the last 5 numbers of the device barcode serial number;
NOTE: THE DEVICE ID number is from 00000 to 61439.
Input some comments of the device information in 【Memo】box, such as equipment geographic location, floors, etc., the contents are auxiliary information, the user can decide to fill or not;
After confirmed all the information, click【Save】to save the new device;
If no need to save,click【Cancel】to cancel the operation;
The saved device will be in the device list page.
Modify device parameters
Find out the device to be modified in the device list then click【Edit】,into the page of device edition, the operation of modifying will be the same as adding new device.
Delete the device
Find out the device need to be deleted then click【Delete】 button will be ok.
4.3 Device Monitoring and Maintenance
Operation Method:
【Device information】 page,Click【Operation】of one Device to the page Device Monitoring and Maintenance, as shown below:
This page will show the setting of control and also the real time running parameters of the device, including alarming, temperature, etc;
The list explanation as follow:
Device main information: Device ID, On/off Line Status, etc.
Parameter Setup button: Setup the value of the parameter and send to the device;
【NO.】: the number of the parameters;
Device parameter selection box: you can set each control parameter if there is a selection box in front of this parameter, without this parameter box selected parameters are read-only, cannot be set; 【Name】:The name of the parameters
【Current value】: the current value of the parameter;
【Set as】:select the value to be set, as shown below
Firstly click the selection box before the settable parameters, and then select the parameter setting values in the drop-down list, after all selected, click [Set up] button;
:Because the page will synchronize the device operating status, the page itself will be constantly refreshed. When clicking any one of the selection box, the page will stop refreshing; if you do not click the selection box, click the set parameter values directly, value will be lost because of page refreshing settings, so the first step in setting parameters must be to click the selection box.
E.g., Setting Power Amplifier switch,as shown below:
Setting RF output power,as shown below:
After clicking【Set up】,page will be refreshing again,after 1 to 2 seconds you will see the result of setting;
NOTE: The value will be updated synchronously with 1 to 2 second delay, the delay is a normal phenomenon because the device need to receive the set value and then returned to the monitoring platform.
Operation Parameters:
Alarm Parameters:
Alarm parameters include VSWR alarm, Under-power alarm , high temperature alarm, etc., as shown below;
There are different Alarms with different priorities, VSWR Alarm> Under-power Alarm > High temperature Alarm, any alarming will lead to power amplifier modules closed to avoid damage to the amplifier modules;
Note 1: The alarm parameters only for query, cannot be set;
Note 2: Different devices have different alarm parameters, not all devices support all alarm parameters described above depending on the customers’ application request.
Real-time Status Parameters:
Including Current Output Power and Temperature, as shown below,
NOTE: Real-time Status Parameters only for query, cannot be set;
Device Configuration Parameters(Settable):
Device configuration parameters, including power amplifier output switch, power amplifier output power adjustment (by percentage adjustment), as shown below.
(DDS) Device also including Output frequency bandwidth adjustment, output frequency sub-band setting, Frequency sweep step setting, etc, as shown below
Note 1: Only Digital (DDS) Devices support the above parameters setting, the parameters supported will be different depending on the customers’ request and contract;
Note 2: The parameters of Output frequency bandwidth adjustment, Output frequency sub-band setting, Frequency sweep step setting, etc, only to be configured by professional technicians, because the configuration error can seriously affect the jamming effect of the device, may even lead to completely unable to jam.
Operation Permission Mangement
【Operation Permission Mangement】to the page as below:
【New】Add new User Group:Click to add a new group:
【Role name】User Group Name;
【Memo】User Group Information memo;
【Powers】User group permissions list, green checking indicates that permission is selected, gray checking indicates that permission is not selected;
【Save】Save the operation;
【Cancel】Cancel the operation;
In the User Group list;
【Edit】Click to edit the User Group Operation Permission, the page is the same as Add new User Group. The user group operation permission will be changed after editing;
【Delete】Click to delete the User Group:Before delete the group, you should delete users in this group or move them to other groups, otherwise cannot be deleted.
User Management
Click 【User Management】 to the page as follow;
【New】Click to add a new User;
【Login Id】 Input User ID,the default password of a new User ID is “123”, this can not be changed while adding new user. The New User can change the password after login;
【Name】Input User Name. Note: This name is only used as a memo of the User, such as real name, not used for login;
【User Group】In the drop-down list to select the Group which the user belongs, then the user gets operation permission of that group;
【Save】Save the operation;
【Cancel】Cancel the operation;
In the user list as follow;
【Edit】Click to edit the user, the operation is the same as adding new user;
【Delete】 click to delete a User;
Change Logo and the Login Background pictures
【Change Logo】 in the NavBar to the page as follow
【Login Background】click the picture, then in the popup window, to select the proper pictures as your background, then click【Open】.
Log out and change the User Password
Click in the NavBar,shown as below:
Here “admin” is the User ID.
Change Password】Click to change the Password of current user, shown as below:
【Old Password】Input old password;
【New Password】Input new password;
【Confirm Password】repeat the new password to confirm;
【Log out】Click to log out this platform.


 Your message must be between 20-3,000 characters!